Salesforce integration

Promoter Ninja
Last Update hace 3 años
In this guide
- Overview of Salesforce integration
- Benefits of integrating with Salesforce
- Recommendations for utilizing the Salesforce integration
Connecting to Salesforce
- Setting up the Salesforce integration
- Integrating responses to Salesforce
- Showing the responses in Salesforce
- Triggering surveys from Salesforce
- Setting up predefined triggers
- Creating custom triggers
Overview of Salesforce Integration
Promoter Ninja's integration with Salesforce (SFDC) allows users to:
- Send Promoter Ninja Surveys: Seamlessly dispatch an email survey to a client following specific Salesforce activities. These triggers can be our standard options—such as when a case is closed or tailored Flows designed within your Salesforce platform.
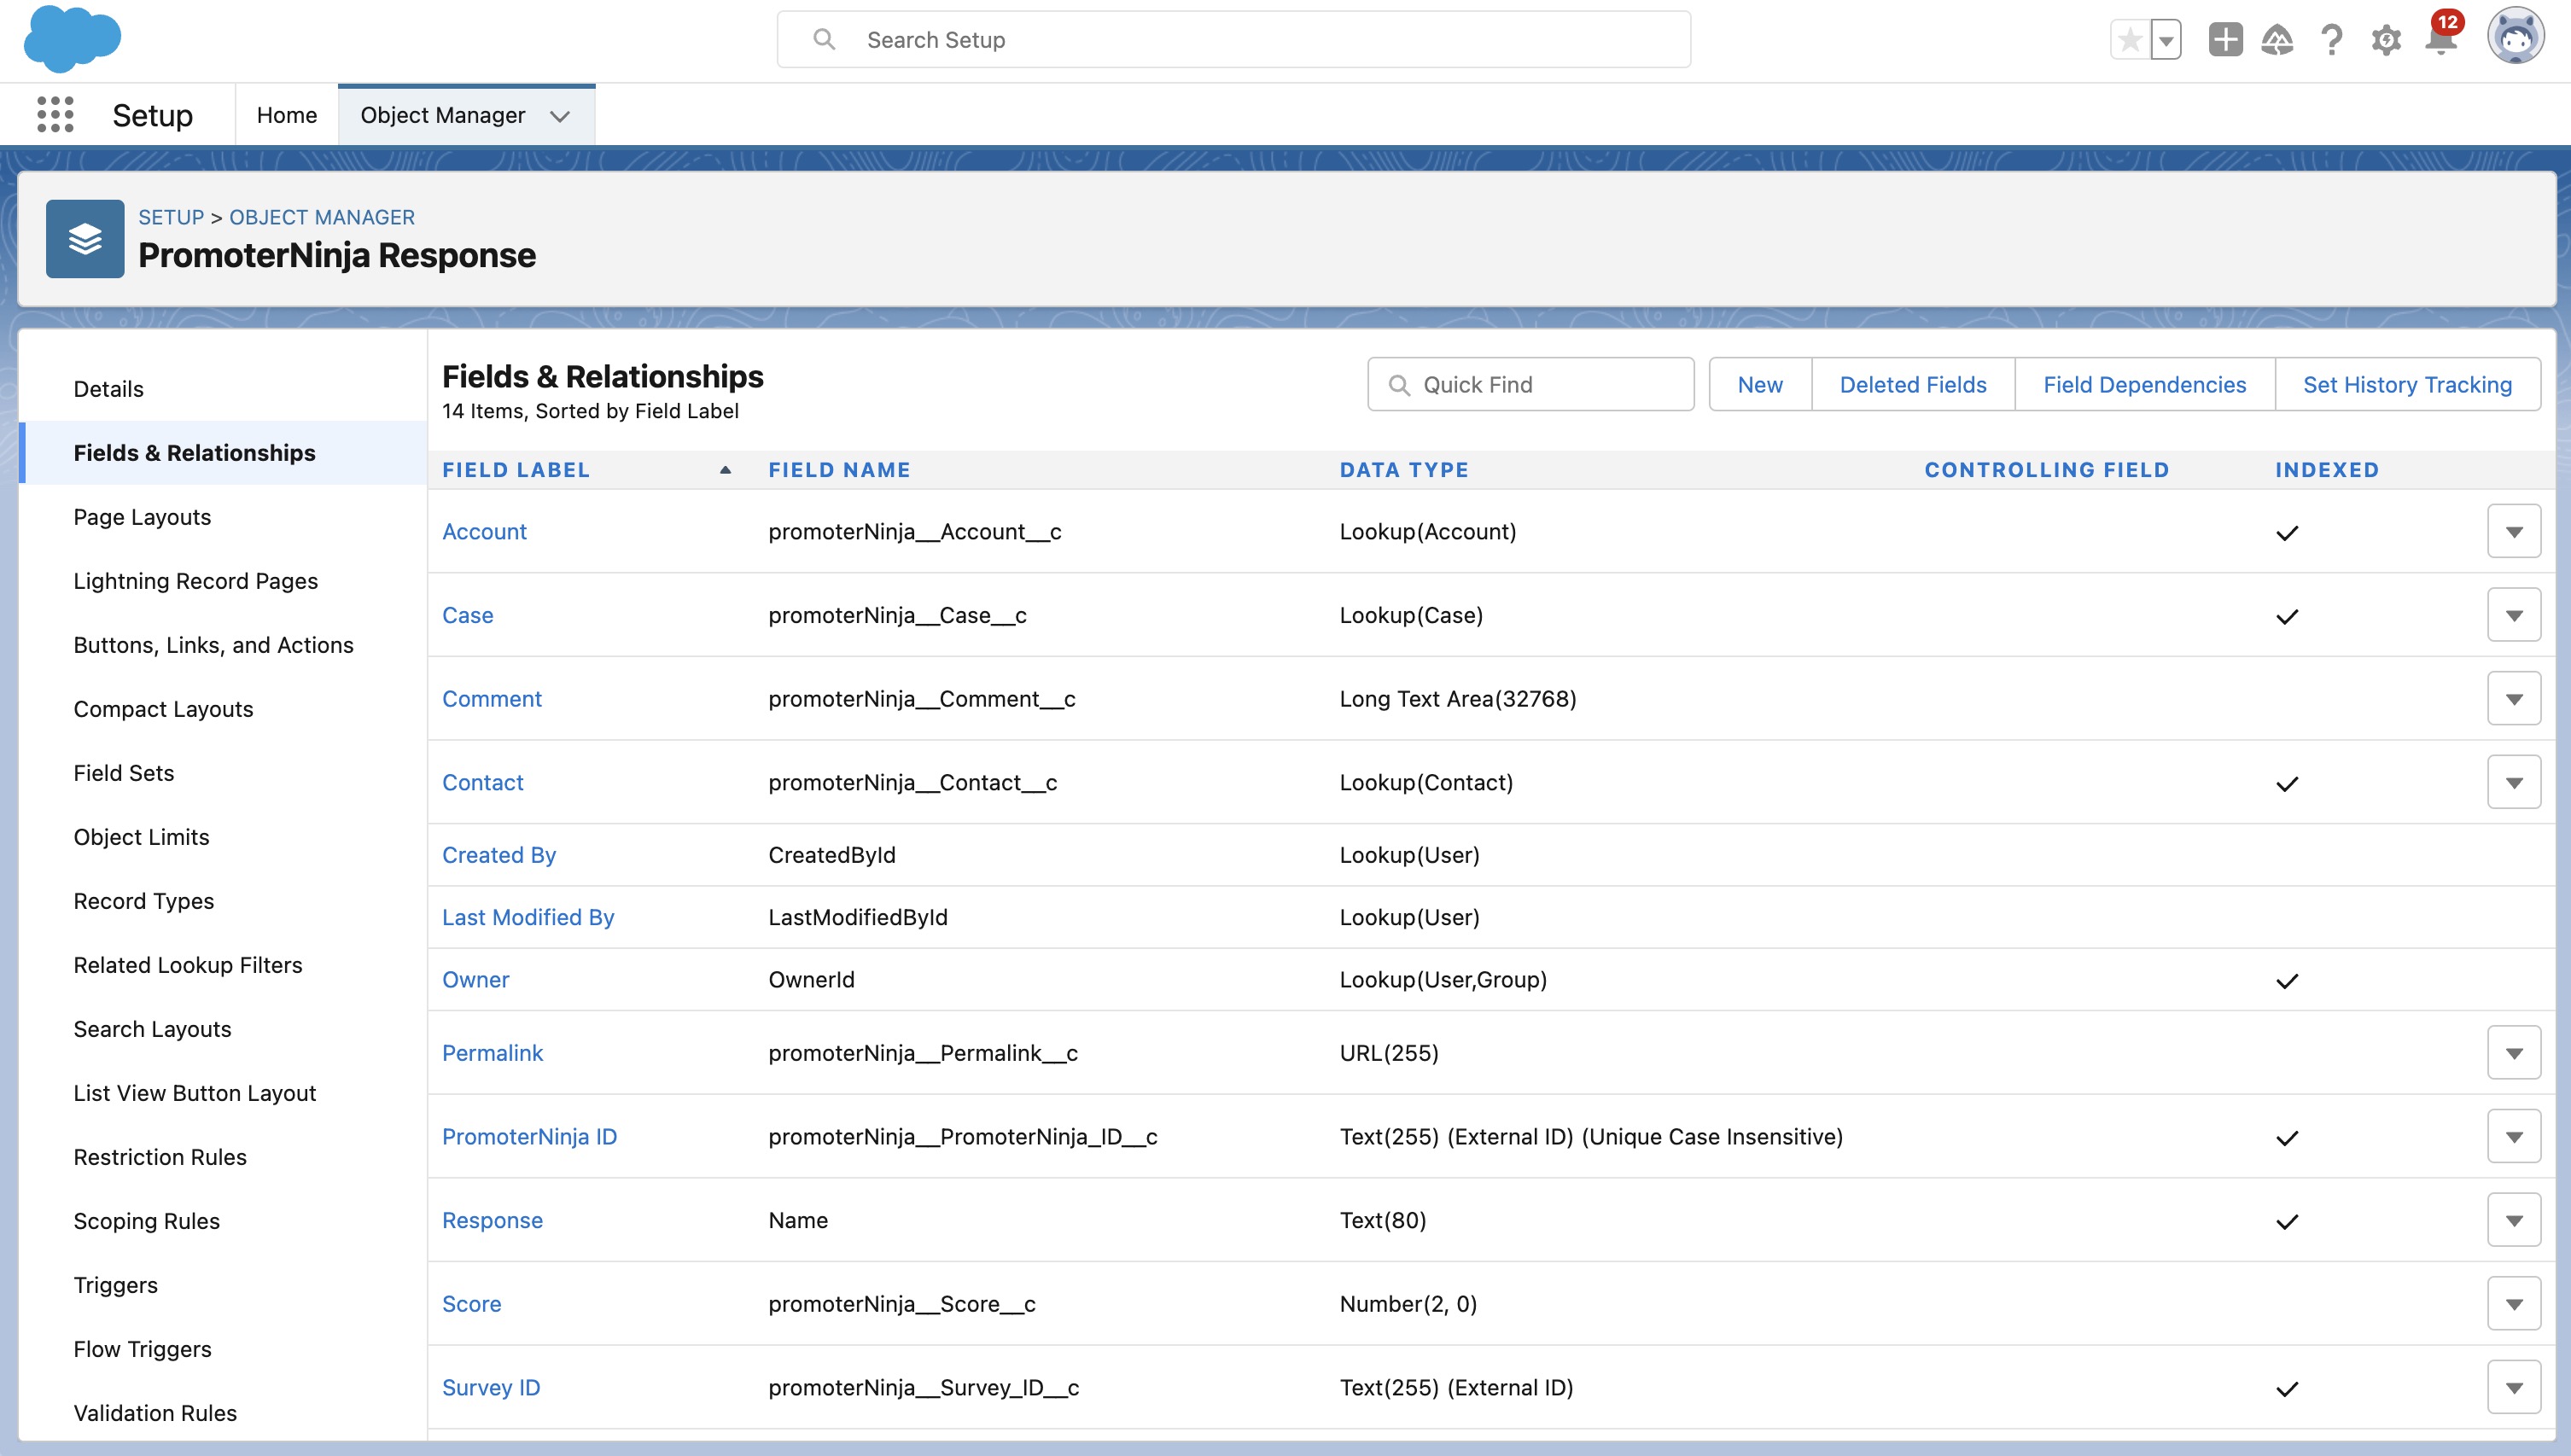
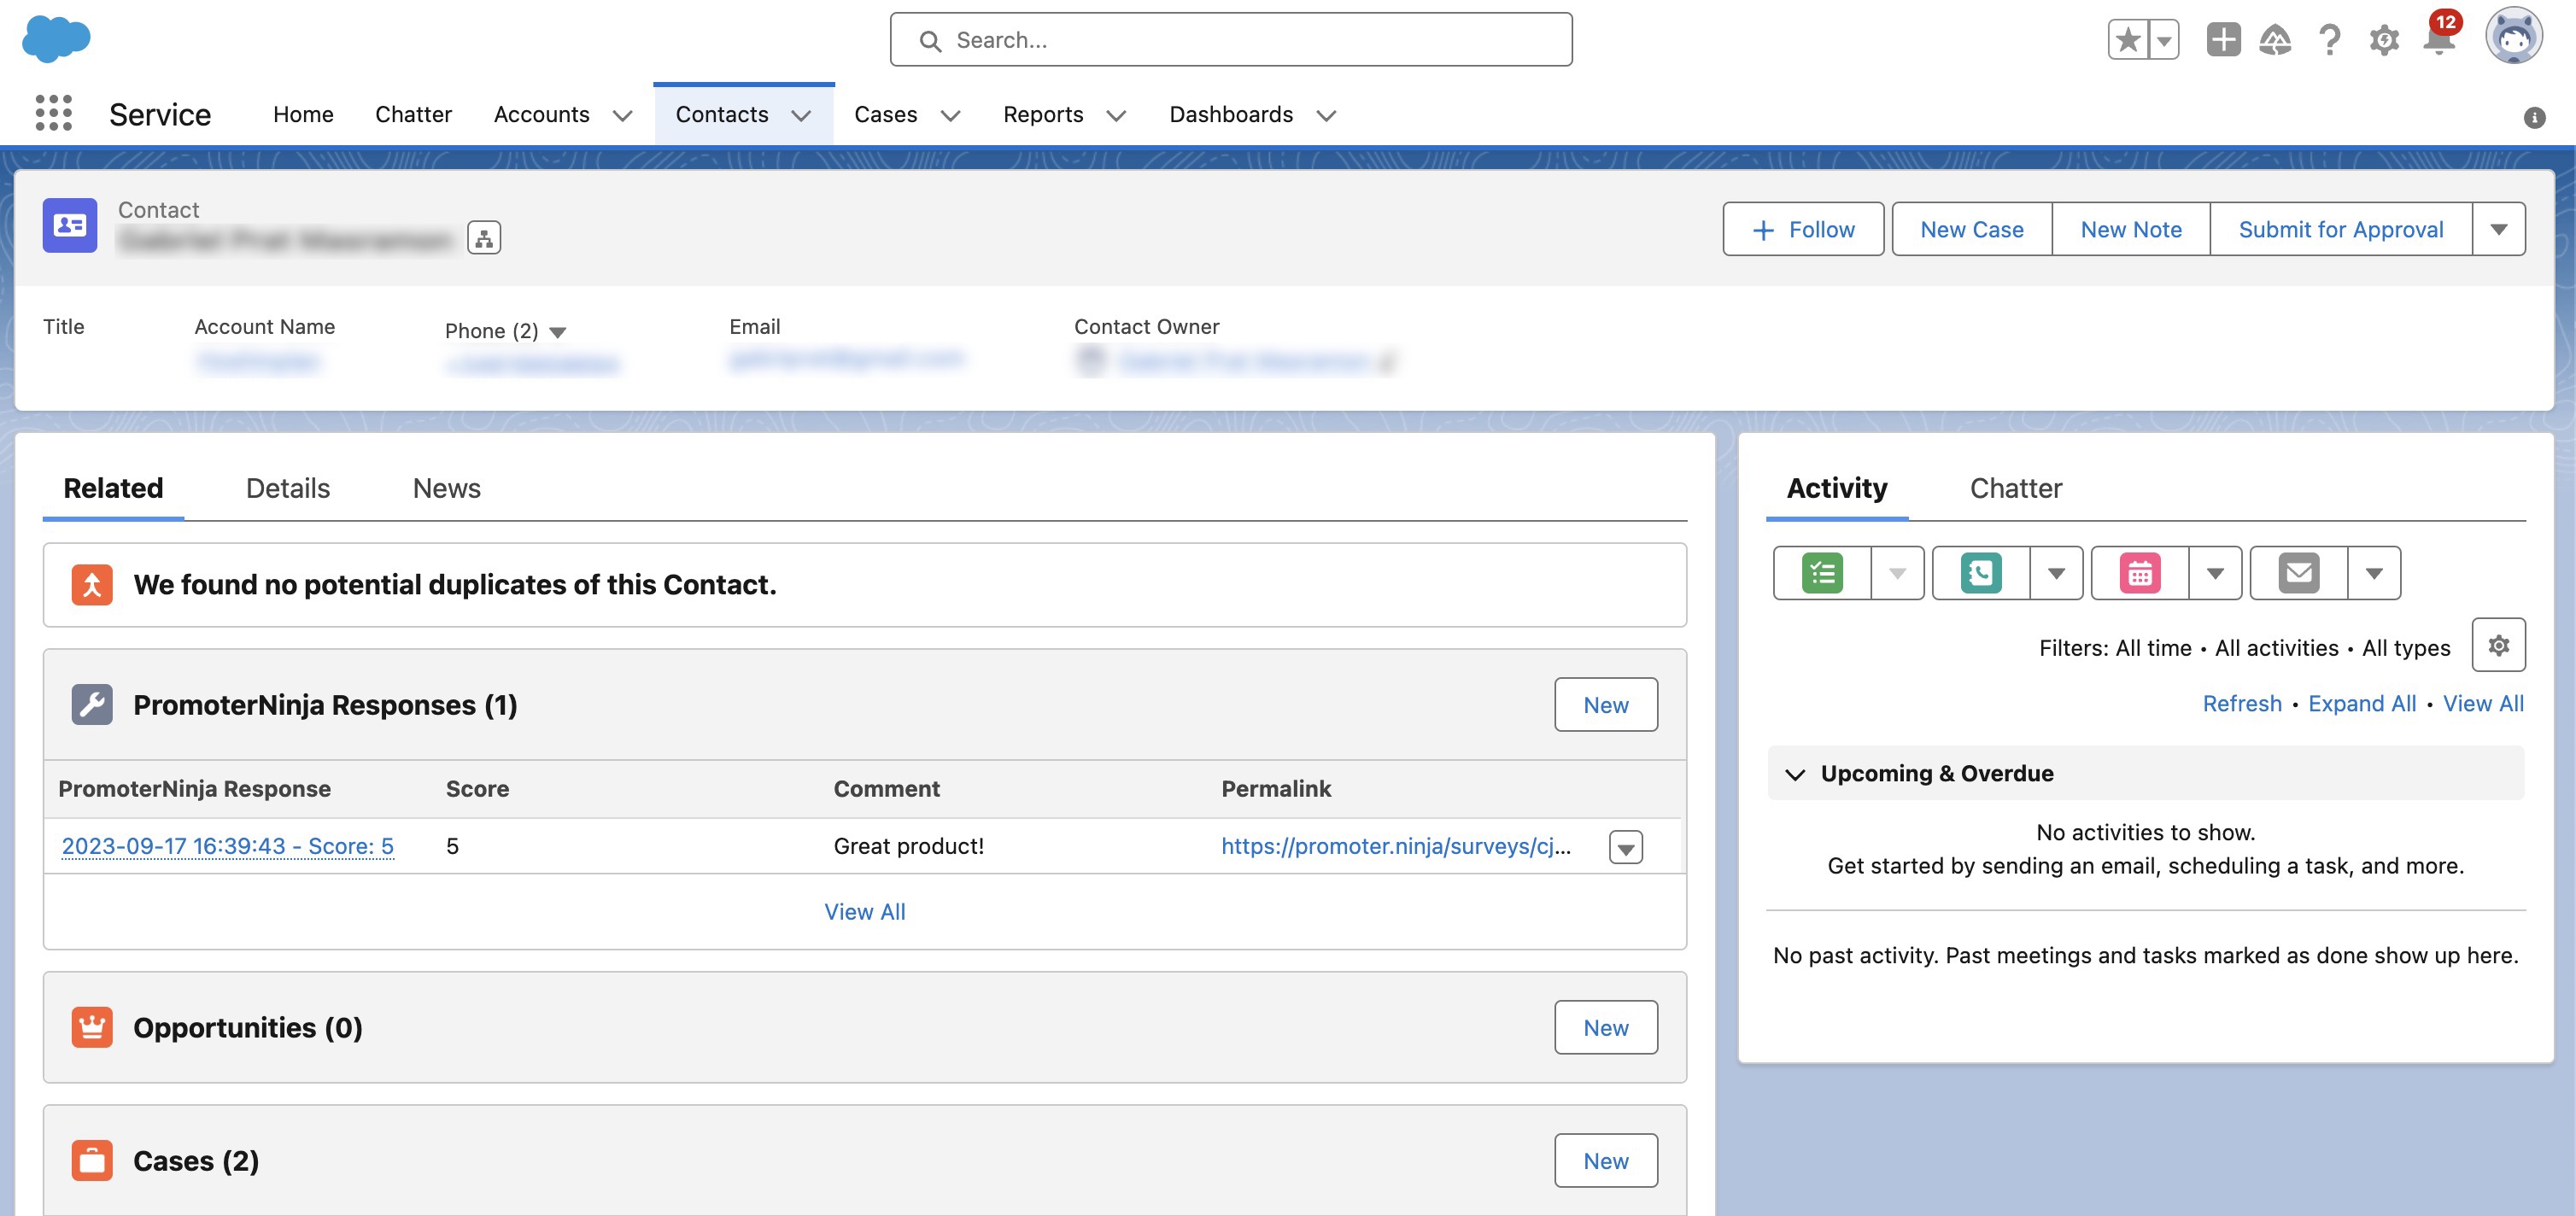
- Send responses back to Salesforce: Effortlessly integrate response data with corresponding cases, contacts, opportunities, and accounts in Salesforce. You will find a related list for each entity with the score, comments, and timestamp of the response.
Benefits of integrating with Salesforce
Promoter Ninja's connection with Salesforce can enhance operational flows and pave the way for tailored report generation. Here are some pivotal advantages of this integration:
- Unify your dashboards: By integrating data from Promoter Ninja to Salesforce, you ensure that feedback and existing SFDC data coexist in one place, granting you immediate access to vital information.
- Facilitate automation and workflows: Our connection directly transmits comprehensive response details—from scores to timestamps—to your Salesforce platform. As Contact records receive new feedback, think about utilizing Flows or Apex Triggers to automate operations based on recently integrated Promoter Ninja feedback.
- Support tailored report creation: Produce reports showing Promoter Ninja feedback or leverage a combination of Promoter Ninja and pre-existing SFDC data (e.g., monitoring NPS trends or showing NPS alongside metrics like MRR).
- Pinpoint customers on the brink of churn: Promoter Ninja's integration with Salesforce updates scores instantly, laying the groundwork for prompt engagement with unsatisfied clients before they decide to depart.
- Spot potential clients for upgrades: Favorable reviews can signal clients who might be receptive to more products, enhanced features, cross-promotion opportunities, and increased MRR.
Recommendations for utilizing the Salesforce integration
Here are several optimal strategies to ensure your Promoter Ninja integration runs smoothly:
- Check Your Salesforce Version: Not every Salesforce version offers API usage. It's a good idea to reference Salesforce’s Trailblazer Community page to ensure compatibility with your current edition/API.
- Utilize a General User for Installation: Modifications to user account details, security protocols, or access settings in Salesforce can lead to access expiration and token-related complications. Bypass potential disruptions by initializing the integration as a neutral user (e.g., [email protected] instead of [email protected]).
- Stay Informed of Workflows and Limitations: As you integrate, it's crucial to be aware of any Salesforce workflows or setups that might prevent updating Contact records. Potential issues may arise during synchronization if you're activating processes based on Promoter Ninja attributes/fields or if you've established bespoke settings mandating particular prerequisites for updating a Contact entry.
Setting up the Salesforce integration
The initial step involves setting up the Promoter Ninja integration package within Salesforce.
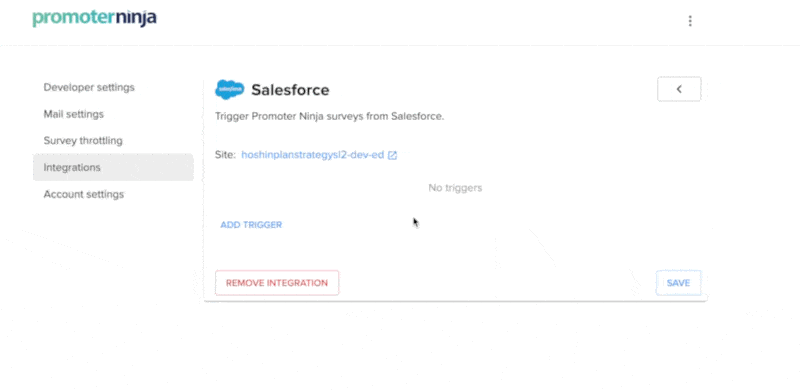
- In Promoter Ninja, click the 3 dots menu at the top left.
- Navigate to "Configuration" and then "Integrations"
- Select Salesforce.
- Press “Set up”.
- You'll be rerouted to Salesforce. If necessary, input your login details.
- Authorize the Promoter Ninja connection.
- You'll be redirected back to the Salesforce integration configuration in Promoter Ninja.
Integrating responses to Salesforce
The integration between Salesforce and Promoter Ninja processes response data through three key steps:
- Feedback received in Promoter Ninja: The feedback is automatically sent to Salesforce upon receipt. If the respondent adds additional comments afterward, the response is updated in Salesforce to include them.
- Identification of Corresponding Salesforce object: If the properties salesforce_contact_id, salesforce_account_id, salesforce_opportunity_id, or salesforce_case_id are provided, the integration will link the response to the appropriate objects.
- Integration of Feedback to the appropriate objects: The response desired details—ranging from the timestamp of the feedback to any property data accompanying the survey query—get incorporated into a Related List.
To seamlessly bridge Promoter Ninja and Salesforce, several components are vital:
- Custom Fields: Each field is structured to display facets of the Promoter Ninja feedback within Salesforce. For instance, a 'Timestamp' field will indicate the precise moment a response was logged in Promoter Ninja. These Custom Fields are excellent tools for crafting bespoke reports within Salesforce.
- Custom Objects: Think of these as the overseers of your Custom Fields. An example would be the "PromoterNinja Response" Custom Object, which encompasses all the associated Custom Fields within the package (like Score, Comment, Permalink, and more). If you're on the hunt for the API name of any Custom Fields related to the Promoter Ninja package, the Custom Object serves as a reliable directory.
- API Access: To facilitate data flow from Promoter Ninja to Salesforce, calls to Salesforce's API are essential. Per survey feedback, around 3 HTTP requests are typically made to Salesforce's API.
Inside every object Related List, you'll find all the responses given by that particular respondent.
Showing the responses in Salesforce
After installing the Promoter Ninja integration package, you're set to activate the feedback data synchronization. Here's how:
- In Promoter Ninja, navigate to the Integrations section and select Salesforce.
- Opt to Sync feedback to both contacts and accounts by ticking the respective checkbox.
- Confirm your modifications.
- Set up the contact layout (further details provided below).
- Adjust the account layout (detailed instructions to follow).
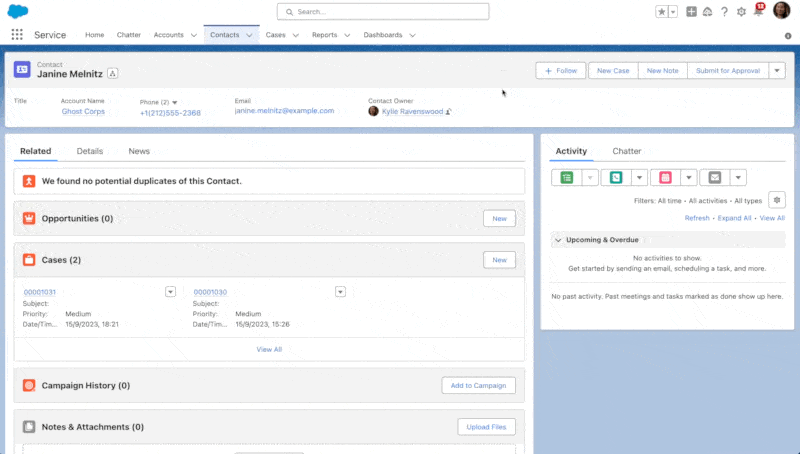
Configuring the object Layout (i.e. Contact, Account, Opportunity, or Case):
- Access Salesforce and log in.
- Open any existing record.
- On the top right, click on the gear icon and then on “Edit object”.
- Click on "Page layouts" and then on the layout you want to edit.
- Drag the 'Promoter Ninja Related List' to the Related List section of the object.
- (Optional) Configure the fields you want to see in the related list.
- Save your changes
Triggering surveys from Salesforce
The Promoter Ninja integration with Salesforce empowers you to launch surveys either through default triggers pre-established in Promoter Ninja or by employing custom triggers defined within your Salesforce platform.
At present, the integration with Salesforce enables survey initiation based on these Entities:
- Account
- Case
- Contact
- Opportunity
Setting up predefined triggers
Promoter Ninja's integration with Salesforce offers a set of predefined triggers that cover the subsequent events:
- Case created
- Case closed
- Opportunity created
- Opportunity won
- Opportunity lost
Vital Points to Consider:
- When dealing with Case and Contact, the survey will be directed to the Contact linked with these entities.
- For Account and Opportunity, as a standard setting, a survey will be sent only for Accounts having 2 or fewer Contacts. The survey won't be sent if an Account lists more than 3 Contacts.
Creating custom triggers
Custom triggers offer the flexibility to pinpoint the precise criteria that initiate a Promoter Ninja survey. By leveraging Flows combined with Outbound Messages, it's feasible to set distinct prerequisites for survey triggers—all seamlessly within your Salesforce platform.
Presently, we support the creation of Flows and Outbound Messages for:
- Accounts
- Cases
- Contacts
- Opportunities
Key Information to Remember
- Ensure alignment between the Outbound Message and Flow pertaining to the same entity (like Case, Account, and so forth).
- If you're in the testing phase and require the capability to dispatch a survey to an identical contact more frequently than once weekly, please reach out to us. We'll assist in minimizing the throttle duration during your testing phase.
Instructions to create the triggers
2. Select “Custom”
3. Find the “The target URL for your Salesforce outbound message” field. Use the icon located at the far end of the URL to copy it.
4. Navigate to your Salesforce platform.
5. Access the "Outbound Messages" area.
6. Create a new Outbound Message.
7. Define the associated Object (Available options: Account, Case, Opportunity, Contact).
8. Populate the Outbound Message form:
- Name: Something like “Promoter Ninja Outbound Message” works best.
- Unique Name: Autopopulated based on the above. Keep default.
- Description: A brief context, like “To invoke Promoter Ninja API”.
- Endpoint URL: Insert the URL from Step 3.
- User to Send As: Keep default.
- Protected Component: Keep unchecked.
- Send Session ID: Ensure it's checked.
- Fields to Send: Keep default settings.
9. Click “Save”.
9. Move over to Flows.
10. Opt for “New Flow”.
11. Pick “Record-Triggered Flow” followed by “Create”.
12. Adjust the initial settings:
- Object: Must be in line with the entity selected in Step 7.
- Trigger the Flow When: Define the event, perhaps when a record is created.
- Condition Requirements: Draft conditions for deploying the Promoter Ninja survey.
- Optimize the Flow for: Select “Actions and Related Records”.
- Leave “Include a Run Asynchronously path…” unchecked.
13. Confirm with “Done”.
14. Click the “+” sign and add the Outbound Message created in Step 9.
15. Customize Action settings with identifiable labels and descriptions.
- Label: Opt for an identifiable name such as “Send Promoter Ninja Survey”.
- API Name: Salesforce will generate this automatically; no changes needed.
- Description: Describe the survey trigger purpose for clarity, although this step is optional.
16. Confirm by selecting “Done”.
17. Although optional, additional steps in the Flow Builder can be integrated.
18. Secure your progress by saving.
19. Click "Save" and configure Flow settings:
Flow Label: Give your Flow a descriptive name, perhaps "Send Promoter Ninja Survey after Contact Created".
- Flow API Name: Salesforce will generate this for you automatically, so no changes are necessary.
- Description: Provide further details about the Flow for clarity if you prefer, but this is entirely optional.
20. Wrap it up by choosing "Activate".
Your custom trigger for Promoter Ninja is now live! It's a good practice to run tests and ensure everything functions as anticipated.